|
|
|
|
|
|
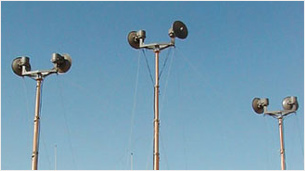
Operation - Vehicle Mounted Heavy Duty Locking Collar Masts
Safety Warning
|
| Warning: death or serious personal injury can result from improper use of this equipment. Pending OSHA regulations require that operators be properly trained in the hazards associated with the use of this equipment. |
|
| 1. |
Select an area free of power lines or other overhead obstructions. The vehicle should be parked no closer than a horizontal distance equal to the extended height of the mast away from any overhead power lines. |
| 2. |
The vehicle should be located on level terrain. |
| 3. |
Remove the canvas top cover (if used) and secure the top load and any required cables to the mast. |
| 4. |
For masts with trip lines, attach color coded trip lines to the matching colored yoke assemblies. Feed the trip lines under the cable guides on all collars up to the collar where they are to be attached. |
| 5. |
Attach the pneumatic system to the mast. |
|
| Warning: make sure all persons and obstructions are clear of the extension path of the mast. Before tripping any yoke assemblies make sure the mast is not pressurized. |
|
| Masts with triplines: |
| 6. |
For masts with trip lines, pull down firmly on the bottom trip line attached to the largest collar. While holding down the trip line, pressurize the mast using the air control valve to extend the first internal mast section. Continue holding down on the trip line while the section is extending. When the section is fully extended release the trip line and stop pressurizing the mast. The spring loaded latch pins will lock this section in the extended position. Exhaust all air from the mast to confirm that the section is locked. If the section comes down, repeat this step. |
| 7. |
Pull the trip line on the next smaller collar to release the next section. Pressurize the mast to extend that section. Continue holding down the trip line while the section is extending. |
| 8. |
Follow the same procedure for each subsequent mast section going from largest to smallest. The color code sequence for the trip lines from largest to smallest is black, brown, red, orange, yellow, green, blue, and white. A mast with fewer than nine sections will start with a color other than black. Maintain visual contact throughout extension to avoid trip line or cable entanglements and to watch for overhead obstructions. |
| Masts with T handle yoke assemblies: |
| 6. |
For masts with T handle yokes extend the mast sections from smallest to largest. Pull down firmly on the top T handle attached to the largest collar. While holding down the T handle, pressurize the mast using the air control valve to extend the first internal mast section. Continue holding down on the T handle while the section is extending. When the section is fully extended, release the T handle and stop pressurizing the mast. The spring loaded latch pins will lock this section in the extended position. Exhaust all air from the mast to confirm that the section is locked. If the section comes down, repeat this step. |
| 7. |
Following the same procedure for each subsequent mast section going from smallest to largest. Watch carefully that none of the cables become tangled or snag on anything as each mast section is extended. |
| 8. |
Any combination of sections can be extended if the full height of the mast is not required. |
| 1. |
If the mast is a manually rotatable model, loosen the locking screws on the base plate approximately one turn. Using its turning handles, rotate the mast to the desired direction. Re-tighten the locking screws to hold the position. |
| 1. |
Before lowering the mast, rotate the mast or top load to allow for enough clearance in the stowed position. |
| Masts with trip lines: |
| 2. |
For masts with trip lines, pressurize the mast until the top yoke assembly latch pins can be disengaged by pulling the trip line. Sufficient pressure to disengage the top latch pins is obtained when this mast section is supported by air pressure. Once latch pins are retracted, exhaust air from the mast while firmly holding down the trip line. The top mast section will begin to retract. Continue holding down on the trip line while the section above is retracting. As soon as this section is fully retracted, stop exhausting air and release the trip line. |
| 3. |
Follow the same procedure for each subsequent mast section working from smallest to largest. |
| 4. |
After all sections have nested, remove the trip lines and the top load. Securely tie the canvas top cover (if used) over the mast. |
| Masts with T handle yoke assemblies: |
| 2. |
For masts with T handles, pressurize the mast to lift the load until the base section yoke assembly latch pins can be disengaged by pulling the bottom T handle. Once the latch pins are disengaged, exhaust the air from the mast while firmly holding down the T handle. Continue holding down the T handle while the first internal mast section above is retracting. When this section is fully retracted, stop exhausting air pressure and release the T handle.
| Warning: keep hands clear of retracting mast sections and collars. |
|
| 3. |
Follow the same procedure for each subsequent mast section, working from largest to smallest. |
| 4. |
Periodically, open the drain cock when exhausting the mast to drain off any accumulated water. |
| 5. |
After all sections have nested, remove the top load. Securely tie the canvas top cover (if used) over the mast. |
|
|