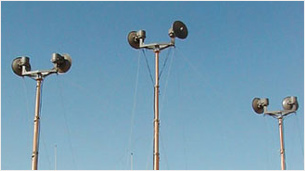
| 1. |
Remove the top load from the mast. This will allow the sections of a non-locking mast to more easily be extended from smallest to largest. See step 3. On locking masts, the sequence of extension can be controlled by the locking collars. |
| 2. |
When a regulator exists in the pneumatic system, reduce its pressure to between 5 and 10 PSIG.
| Warning: 10 PSIG should be sufficient pressure to extend all sections of the mast without a top load. If any section will not extend with 10 PSIG the mast may require overhaul. Consult the factory. |
|
| 3. |
One person operating the air control valve should slowly pressure the mast just enough to extend the top mast section. Another person may need to hold down the larger mast section collars to assure the proper sequence of extension. Close the air control valve as soon as the mast section is up. |
| 4. |
Wipe down the extended mast section using a non-abrasive cleaner or solvent such as lacquer thinner. Do not allow the cleaning fluid or solvent to run down inside the collar. |
| 5. |
Repeat steps 3 and 4 for the next larger mast section. |
| 6. |
Inject approximately 1/2 ounce of TMD Mast Lubricant or a light weight machine oil into the weep hole (drain) of the exposed mast section. The weep holes are located between one and three feet below the collar on each tube except the top one. |
| 7. |
Repeat steps 3, 4, and 6 for each of the remaining mast sections. The larger diameter sections should be injected with approximately 1 ounce of lubricant. |
| 8. |
Lower the mast completely. Allow several minutes for the lubricant to settle and spread around the wear ring and seal at the bottom of each mast section.
| Warning: keep hands clear of the descending collars while the mast is being lowered to avoid pinching. |
|
| 9. |
Extend the mast again one section at a time in the same sequence (smallest to largest). Wipe off any excess lubricant which flows out of the weep holes.
| Note: do not lubricate the exterior of the mast as this will cause it to attract dust and contaminants from the air. |
|